LAB - PHYSICAL CHANGE and reversing physical change
SDS Safety Documents
|
|
|
| ||||||||
Lab Packet
| physical_change_lab.docx |
overview
PURPOSE: To learn the differences between and physical properties of mixtures and compounds, as well as to be able to understand how mixtures and are physically separated.
BEFORE STARTING: Decide on Jobs and have the Reader read through ALL of the Instructions. You will not be given more substances if you make a mistake or mishandle your substances!!!!!!!
JOBS: Job #1: Reader, recorder, and dry substance pourer; Job #2: Substance measurer and paper holder, conductivity measurer; Job #3: Magnet user and filtering apparatus builder (If you have 4 people on your team: Job #1 stays the same, Job#2 paper holder and conductivity measurer, Job #3: Liquid substance pourer and paper handler, Job #4: stays the same)
MATERIALS:
- SDS Sheets
- Lab Packet
- Goggles
- Lab Coat
- Heat Gloves or Tongs
- Scale
- Burner
- Iron filings, Fe, 5g
- Sand, SiO2, 5 g
- Sodium chloride, NaCl, 5 g
- Zinc, mossy, Zn, 5 g
- Distilled Water, H2O, 50 mL
- 400 mL beaker
- 250 mL beaker
- Filter paper
- Funnel
- Magnetic wand
- Screen
- Sheet of notebook paper (student to provide)
- Stirring Rods
- Weighing papers (squares of paper)
1. Everyone will wear safety glasses during the lab
2. Everyone will wear gloves during the lab
3. Person pouring substances will wear an apron
4. EVERYONE WILL FOLLOW LAB AND CLASSROOM RULES; EVERYONE WILL READ THE SDS FOR EACH SUBSTANCE WE WILL USE TODAY
5. We will be using glass beakers, which need to be handled with great care!
6. We will be using a hot plate, which needs to be handled with great care!
7. Do not remove beaker after heating until the beaker is safe to touch (not too hot - will not burn you)
INSTRUCTIONS: READ BEFORE DOING ANYTHING! YOU WILL NOT GET MORE CHEMICALS IF YOU MESS UP!!!!!!
Read all of the instructions. Be sure you understand a step before you do it!!!!
Step 1. Take a small square of paper and mass out approximately 5 g of iron filings; using another square of paper weight out 5 g of mossy zinc; using yet another square of paper weight out 5 g of sand, and yet another square of paper and weigh out 5 g of sodium chloride. Record the exact mass of each material to the nearest tenth of a gram in Table 1.
Step 2. Carefully observe each of the four pure substances. Record observations of physical properties. NOTE: BE VERY DESCRIPTIVE!!!!!
Step 3. Test each substance with a magnet. Run the magnet bar underneath each piece of paper holding a substance. Record these observations in Table 2.
Step 4. Use the glass stirrer to combine the four substances together in the 400-mL beaker. Record observations of the newly formed mixture in Table 3 (Step 4).
Step 5. Pour the prepared mixture onto one half of a whole sheet of notebook paper (NOTE: DO NOT CUT PAPER IN HALF, KEEP THE PAPER AS A WHOLE PIECE). Pass a magnet underneath the paper moving the magnetic materials to the clean half of the paper. Completely separate the magnetic material, collect it on a piece of weighing paper, re-mass it on the scale (re-mass it means to re-measure it) and then identify it. Record the ending mass in Table 1 and record observations of the separated material in Table 3 (Step 5).
Step 6. Place a screen on top of the 400 -mL beaker. Pour the remaining mixture (non-magnetic materials) onto the screen. Sift the mixture over the beaker so that the smaller particles fall through the screen and the larger particles remain on the screen. Separate and collect the material retained by the screen on a piece of weighing paper. Re-mass it on the scale and identify the material. Record the mass in Table 1 and record observations of the separated material in Table 3 (Step 6).
Step 7. Add about 50 mL of distilled water to the beaker containing the remaining mixture and swirl the beaker gently.
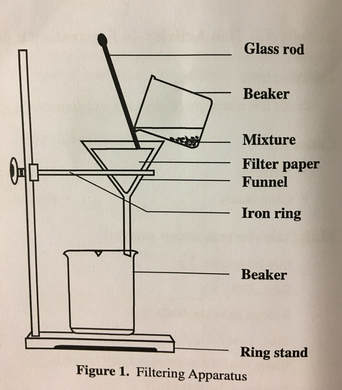
Step 8. Set up a filtering apparatus as shown in Figure 1.
Step 9. Measure the mass of an empty 250-mL beaker and record the mass in Table 4. Place the empty beaker underneath the funnel. Pour the contents of the 400-mL beaker into the funnel. Take care that no material is poured over the edges of the filter paper. Rinse this beaker and any solid it contains with about 10-mL of distilled water. Pour this rinse into the funnel.
Step 10. Observe the contents of the beaker and of the filter paper. Record observations in Table 3 (Step 10). Remove the filter paper from the funnel, unfold it and allow it to dry overnight. Put the filter paper on another piece of paper that has your team members names and class period. Put it on the counter by the window. Identify the material.
NEXT DAY: When dry, measure the separated material on the filter paper. Record the mass in Table 4. Calculate the mass of the dry, separated material and transfer this mass to Table 1.
Step 11. Place the 250-mL beaker on a hot plate set at low-medium heat. Allow most of the liquid to evaporate. Turn the heat down if splattering occurs. When only a small bit of liquid remains (DO NOT LET THE LIQUID COMPLETELY EVAPORATE!), turn off the heat and allow the remaining liquid to evaporate. After the beaker is cool enough to touch, put the beaker on the same piece of paper that you have put your filter on to dry.
Step 12: NEXT DAY: When the beaker is cool and dry, examine the contents, identify the material, and record observations in Table 3 (Step 12). Measure the mass of the beaker plus the separated material (material #4) and record the mass in Table 4. Calculate the mass of the dry separated material and transfer this mass to Table 1.
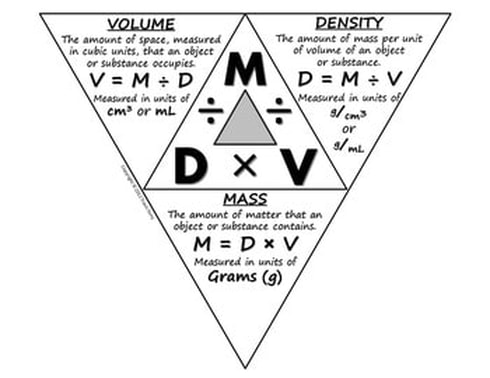
STEP 13: USE THE DENSITY TABLE to find the density for iron, zinc, sodium chloride, and sand. Then calculate the information for Volume to complete your table.
CLEAN UP DAY ONE:
EVERYONE HELPS CLEAN UP!
1. Be sure that the hot plate has been turned off!!!
2. Plug the sink with the stopper and fill the sink part way. Squirt a nickel size amount of soap in the water. Using the sponge was out the large beaker, the funnel and the glass stirring stick. Rinse these items with water and place them in the dish rack to dry.
3. Wipe off the base of the ring stand, the scale, and your team's work area with a damp (not soaking wet) sponge. Once you have finished using the water in the sink, let out the water and rinse out the sink. The sink should be clean.
4. Put a clean 250-mL beaker, clean 400-mL beaker, and new piece of filter paper on your tray.
5. Retrieve the funnel (dry with cloth if not dry already) and the glass stirring stick (dry with cloth if not dry already) on your tray.
6. Be sure that your entire area is clean. Sit at your table so that your area and supplies can be inspected.
NO ONE LEAVES UNTIL YOUR AREA IS CLEAN!
CLEAN UP DAY TWO:
1. Throw away filter paper when done with the lab.
2. Plug the sink with the stopper and fill the sink part way. Squirt a nickel size amount of soap in the water. Using the sponge was out the beaker. Place the beaker in the dish rack to dry.
3. Throw away paper that held your team's filter paper and beaker.
4. Once you have finished using the water in the sink, let out the water and rinse out the sink. The sink should be clean.
5. Make sure that you have logged out of your iPad properly and returned it to the proper bin.
6. Put away your science journal and science binder to the correct crate.
7. Be sure that your entire area is clean. Sit at your table so that your area and supplies can be inspected.
NO ONE LEAVES UNTIL YOUR AREA IS CLEAN!
Step 1. Take a small square of paper and mass out approximately 5 g of iron filings; using another square of paper weight out 5 g of mossy zinc; using yet another square of paper weight out 5 g of sand, and yet another square of paper and weigh out 5 g of sodium chloride. Record the exact mass of each material to the nearest tenth of a gram in Table 1.
Step 2. Carefully observe each of the four pure substances. Record observations of physical properties. NOTE: BE VERY DESCRIPTIVE!!!!!
Step 3. Test each substance with a magnet. Run the magnet bar underneath each piece of paper holding a substance. Record these observations in Table 2.
Step 4. Use the glass stirrer to combine the four substances together in the 400-mL beaker. Record observations of the newly formed mixture in Table 3 (Step 4).
Step 5. Pour the prepared mixture onto one half of a whole sheet of notebook paper (NOTE: DO NOT CUT PAPER IN HALF, KEEP THE PAPER AS A WHOLE PIECE). Pass a magnet underneath the paper moving the magnetic materials to the clean half of the paper. Completely separate the magnetic material, collect it on a piece of weighing paper, re-mass it on the scale (re-mass it means to re-measure it) and then identify it. Record the ending mass in Table 1 and record observations of the separated material in Table 3 (Step 5).
Step 6. Place a screen on top of the 400 -mL beaker. Pour the remaining mixture (non-magnetic materials) onto the screen. Sift the mixture over the beaker so that the smaller particles fall through the screen and the larger particles remain on the screen. Separate and collect the material retained by the screen on a piece of weighing paper. Re-mass it on the scale and identify the material. Record the mass in Table 1 and record observations of the separated material in Table 3 (Step 6).
Step 7. Add about 50 mL of distilled water to the beaker containing the remaining mixture and swirl the beaker gently.
Step 8. Set up a filtering apparatus as shown in Figure 1.
Step 9. Measure the mass of an empty 250-mL beaker and record the mass in Table 4. Place the empty beaker underneath the funnel. Pour the contents of the 400-mL beaker into the funnel. Take care that no material is poured over the edges of the filter paper. Rinse this beaker and any solid it contains with about 10-mL of distilled water. Pour this rinse into the funnel.
Step 10. Observe the contents of the beaker and of the filter paper. Record observations in Table 3 (Step 10). Remove the filter paper from the funnel, unfold it and allow it to dry overnight. Put the filter paper on another piece of paper that has your team members names and class period. Put it on the counter by the window. Identify the material.
NEXT DAY: When dry, measure the separated material on the filter paper. Record the mass in Table 4. Calculate the mass of the dry, separated material and transfer this mass to Table 1.
Step 11. Place the 250-mL beaker on a hot plate set at low-medium heat. Allow most of the liquid to evaporate. Turn the heat down if splattering occurs. When only a small bit of liquid remains (DO NOT LET THE LIQUID COMPLETELY EVAPORATE!), turn off the heat and allow the remaining liquid to evaporate. After the beaker is cool enough to touch, put the beaker on the same piece of paper that you have put your filter on to dry.
Step 12: NEXT DAY: When the beaker is cool and dry, examine the contents, identify the material, and record observations in Table 3 (Step 12). Measure the mass of the beaker plus the separated material (material #4) and record the mass in Table 4. Calculate the mass of the dry separated material and transfer this mass to Table 1.
STEP 13: USE THE DENSITY TABLE to find the density for iron, zinc, sodium chloride, and sand. Then calculate the information for Volume to complete your table.
CLEAN UP DAY ONE:
EVERYONE HELPS CLEAN UP!
1. Be sure that the hot plate has been turned off!!!
2. Plug the sink with the stopper and fill the sink part way. Squirt a nickel size amount of soap in the water. Using the sponge was out the large beaker, the funnel and the glass stirring stick. Rinse these items with water and place them in the dish rack to dry.
3. Wipe off the base of the ring stand, the scale, and your team's work area with a damp (not soaking wet) sponge. Once you have finished using the water in the sink, let out the water and rinse out the sink. The sink should be clean.
4. Put a clean 250-mL beaker, clean 400-mL beaker, and new piece of filter paper on your tray.
5. Retrieve the funnel (dry with cloth if not dry already) and the glass stirring stick (dry with cloth if not dry already) on your tray.
6. Be sure that your entire area is clean. Sit at your table so that your area and supplies can be inspected.
NO ONE LEAVES UNTIL YOUR AREA IS CLEAN!
CLEAN UP DAY TWO:
1. Throw away filter paper when done with the lab.
2. Plug the sink with the stopper and fill the sink part way. Squirt a nickel size amount of soap in the water. Using the sponge was out the beaker. Place the beaker in the dish rack to dry.
3. Throw away paper that held your team's filter paper and beaker.
4. Once you have finished using the water in the sink, let out the water and rinse out the sink. The sink should be clean.
5. Make sure that you have logged out of your iPad properly and returned it to the proper bin.
6. Put away your science journal and science binder to the correct crate.
7. Be sure that your entire area is clean. Sit at your table so that your area and supplies can be inspected.
NO ONE LEAVES UNTIL YOUR AREA IS CLEAN!
liquid density lab

Learning Objectives:
Students need to use goggles while handling glass, in case there is there a broken beaker. Students need to wear goggles while pouring liquids to insure that no liquid splashes into your eyes.
Materials Needed:
1. FACILITATOR reads the instructions from the Lab Sheet to the team.
2. Put on Goggles and Lab Coat
3. Complete lab
4. Clean Up
5. Turn in Lab Sheet to Mrs. Smith
- I will find out how density affects liquids by layering different types of liquids
- I will be able to figure out the mass and density of each liquid
Students need to use goggles while handling glass, in case there is there a broken beaker. Students need to wear goggles while pouring liquids to insure that no liquid splashes into your eyes.
Materials Needed:
- Pencil
- 6 different liquids
- Scale
- LARGE Beaker to collect liquids
- Calculator
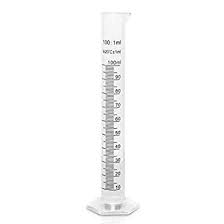
- Graduated Cylinder for each liquid
- Lab Packet
- Science Journal
1. FACILITATOR reads the instructions from the Lab Sheet to the team.
2. Put on Goggles and Lab Coat
3. Complete lab
4. Clean Up
5. Turn in Lab Sheet to Mrs. Smith
DENSITY - Solids Lab
OBJECTIVE: Students will learn about how density can effect a solid depending on the material it is made of
MATERIALS NEEDED:
PROCEDURES:
1. Decide who in your group will be the Reporter (they will be reading instructions today), the Resource Manager (they will be responsible for getting and returning all of the materials), the Facilitator (they will be responsible for making sure that everyone has completed each task before the group goes on to the next task.
2. Have the Reporter read the instructions for the lab.
3. Take turn measuring each of the cylinders. Be sure to record your findings.
4. Complete your lab sheet as you go along. Facilitator makes sure that everyone is done before moving to the next task.
5. When finished complete your lab sheet and EVERYONE HELPS CLEAN UP!
6. Turn lab sheet into Mrs. Smith. She will dismiss you when you have completely cleaned up.
MATERIALS NEEDED:
- Graduated Cyclinder
- Solid cube sets (same size and varied sizes)
- Glass Beaker with Water
- Scale
- Lab Coat
- Goggles (ALWAYS wear when using glass beaker)
PROCEDURES:
1. Decide who in your group will be the Reporter (they will be reading instructions today), the Resource Manager (they will be responsible for getting and returning all of the materials), the Facilitator (they will be responsible for making sure that everyone has completed each task before the group goes on to the next task.
2. Have the Reporter read the instructions for the lab.
3. Take turn measuring each of the cylinders. Be sure to record your findings.
4. Complete your lab sheet as you go along. Facilitator makes sure that everyone is done before moving to the next task.
5. When finished complete your lab sheet and EVERYONE HELPS CLEAN UP!
6. Turn lab sheet into Mrs. Smith. She will dismiss you when you have completely cleaned up.
|
| ||||
physical and chemical changes LAB
| physical_and_chemical_changes_lab.docx |
Student Learning Objectives:
- Students will conduct experiments to understand the various properties of the different states of matter
- Safety Goggles - every one
- Lab Coat - every one
- Graduated Cylinder
- Plastic Cups - large
- Plastic Cups - tiny
- Ice
- Water
- Scale
- Spoons
- Timer
- Antacid Tablets
- Baking Soda
- Lemon Juice
- Vinegar
- Milk
- Kool-Aid Powder
Please wear your goggles throughout the lab - it is easy to pour or while using powders to get them in your eyes. (Ouch!)
Procedures:
1. Read through all Experiments BEFORE you start. If you do not understand what to do - ASK Mrs. Smith!!!!
2. For each experiment you will record your observations on the Lab Table.
3. Discuss with your team the Discussion Questions
Procedures:
1. Read through the first page of your lab sheet with your team. You will need to understand the following terms:
- State of Matter
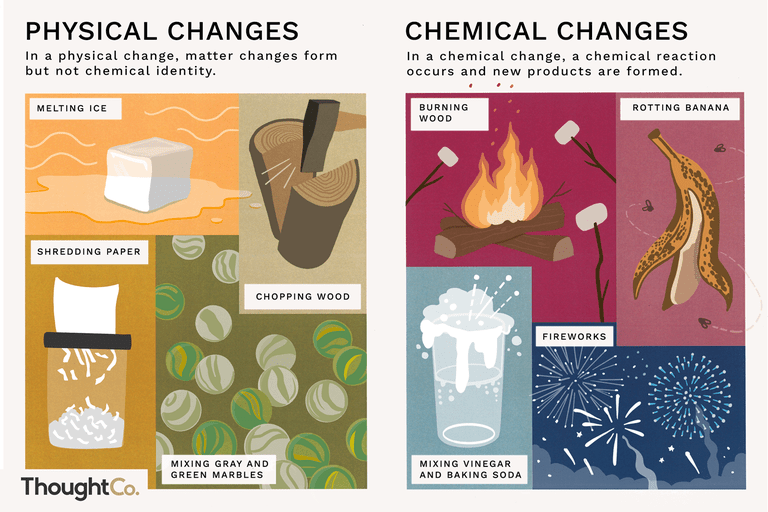
- Physical Change
- Chemical Change
3. Write down your observations on the lab table.
4. Be sure to follow instructions carefully! You will be returning to some experiments to make additional observations and measurements.
Experiment A: Antacid tablet
1. Observe and describe the antacid tablet at your table.
2. Break the tablet into small pieces.
a. Is this a physical or chemical change?
3. Using a graduated cylinder, measure 50 ml of water and add it to a cup. Drop the tablet pieces into the cup.
4. Observe what happens.
a. Is this a physical or chemical change?
5. When you are finished, empty the cup, rinse the cup with water and save the cup for experiment B.
Experiment B: Ice
1. In the empty cleaned cup from experiment A, place 1 ice cube in the cup.
2. Observe and record how the ice looks and feels.
3. Set the cup and ice cube aside until you are finished with the other experiments.
Experiment C: Baking soda and lemon juice
1. With a graduated cylinder, measure 40 ml of lemon juice and add it to a larger container. Rinse the graduated cylinder.
2. Add 1 teaspoon of baking soda to the lemon juice in the larger container.
3. Observe and record the changes.
a. Is this a physical or chemical change?
4. Empty the container, rinse it, and save it for experiment E.
Experiment E: Baking soda and vinegar
1. Add 1 teaspoon of baking soda to the cleaned container from Experiment C
2. Using the graduated cylinder, measure 10 ml of vinegar. Add the vinegar to the baking soda container.
3. Observe and record the change.
a. Is this a physical or chemical change?
4. Empty the container, rinse the container and graduated cylinder and save them for experiment F.
Experiment F: milk and vinegar
1. Using the graduated cylinder, measure 50 ml of milk and add it to the container saved from experiment F.
2. Using the graduated cylinder, measure 30 ml of vinegar and add it to the same container.
3. Observe and record the change.
a. Is this a physical or chemical change?
4. Rinse the equipment (graduated cylinder and container).
Experiment G: Kool-Aid and water
1. Add 1 teaspoon of Kool-Aid powder to a jar.
2. Using the graduated cylinder, add 60 ml of water to the same jar.
3. Close the lid of the jar and gently mix by swirling it.
4. Observe and record the change.
a. Is this a physical or chemical change?
Back to Experiment B: Ice
1. Look at the cup that held the ice cube from experiment B.
2. Observe and record the change.
a. Is this a physical or chemical change?
Assignments:
- Complete the lab packet and turn it in at the end of the class period
- Be sure that your team cleans your area and materials, then puts everything back where it belongs.
Bubble Lab
Student Learning Objectives:
- Students will learn the basic steps for completing a science lab
- Students will determine through data and evidence which soap creates the largest bubble
- Small cups of Soap A, B, and C
- Metric Ruler
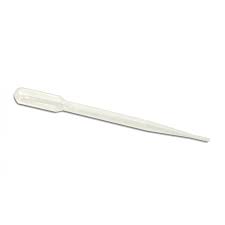
- Pipette (see image on the right)
- Paper Towels
- Lab Sheet
- Pencil
- Calculator
- Safety Goggles
- Everyone must use safety goggles during this lab to ensure you do not get soap in your eyes. IF YOU GET SOAP IN YOUR EYES, SEE MRS. SMITH IMMEDIATELY!
- Determine who will be responsible for each team role: Facilitator, Team Captain, Recorder, Reporter, Resource Manager
- Review responsibilities for each role (should be in your science journal) Be sure that you are asking the required questions at the appropriate times during the lab.
- Resource Manager retrieve materials for lab
- Each team member: Use the pipette to put 3-4 large drops of soap solution on the table into a small puddle.
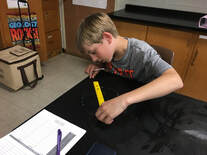
- Each team member: Put one end of the straw into your soap puddle and practice blowing bubbles until you can blow a large bubble without it popping.
- Each team member: Blow a large bubble until it pops. The popped bubble will leave a ring on the table.
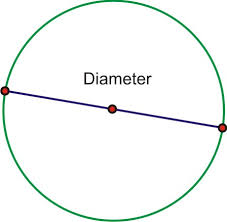
- Each team member: Use the metric ruler to measure the diameter of the bubble in cm.
- Each team member: Record your data on the Individual Data Collection Table.
- Each team member: Repeat steps 4-8 four times for each soap type.
- Team: compare data findings, Recorder will fill out the Team Data Collection Table
- Each team member: Based on team data, create a graph depicting the data
- Each team member: Complete the lab questions below and in Data Analysis and Conclusion sections
- Reporter: Share your team’s data with the class along with your conclusion and evidence
- ALL TEAM MEMBERS: Help clean up the lab, collect materials and return items. Resource Manager makes sure that everyone is helping and that materials are all accounted for and returned.

Put on and wear goggles.
|
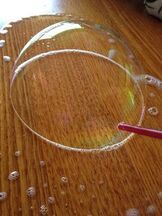
Put bubble solution on table with pipette. Use straw to blow bubble.
|
Measure the diameter (cm) of the bubble and record data on Individual Data Collection Table.
|
|
Lab Forms
|
| ||||
